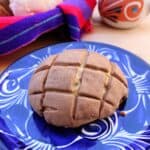
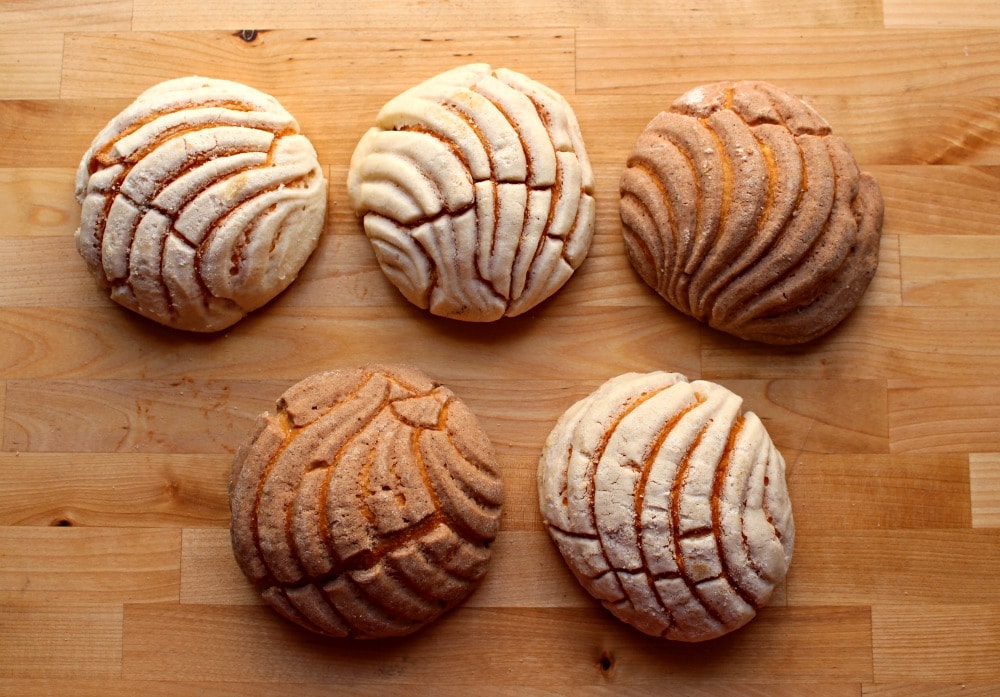
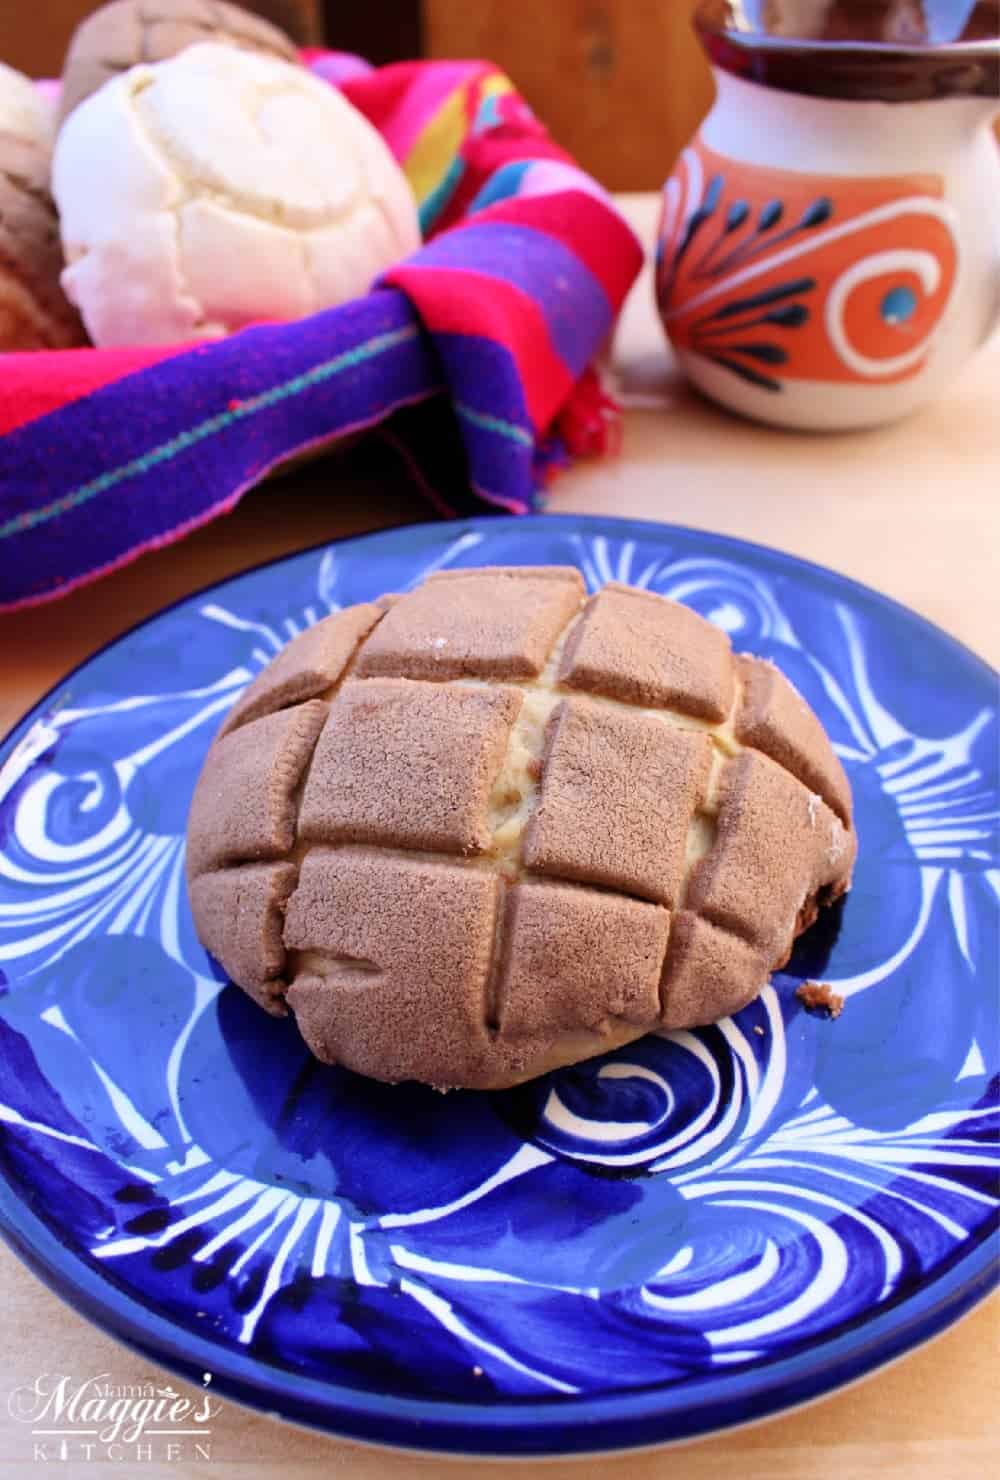
Mexican Conchas are soft and yummy sweet bread roll with a shell-shaped sugar topping.
In Spanish, “concha” means “shell” 🐚 which is where this dessert bread gets its name.
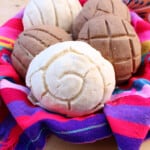
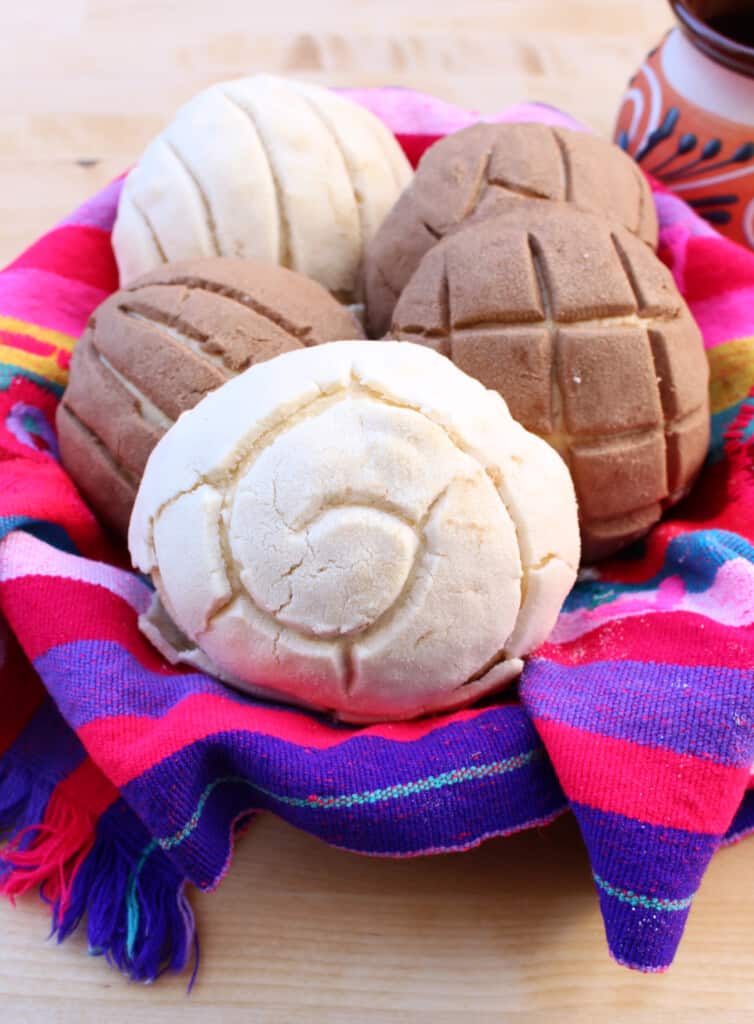
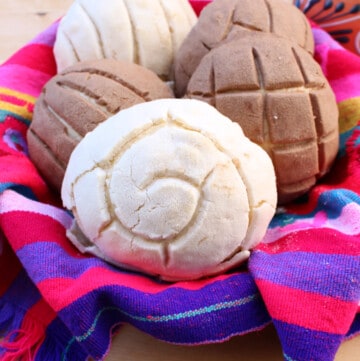
Among all the Mexican sweet breads, this is undoubtedly the most popular.
They are easily found at any and all Mexican bakeries. Enjoyed with hot chocolate or a cup of coffee morning, day, or night.
Table of Contents
Ingredients for the Dough
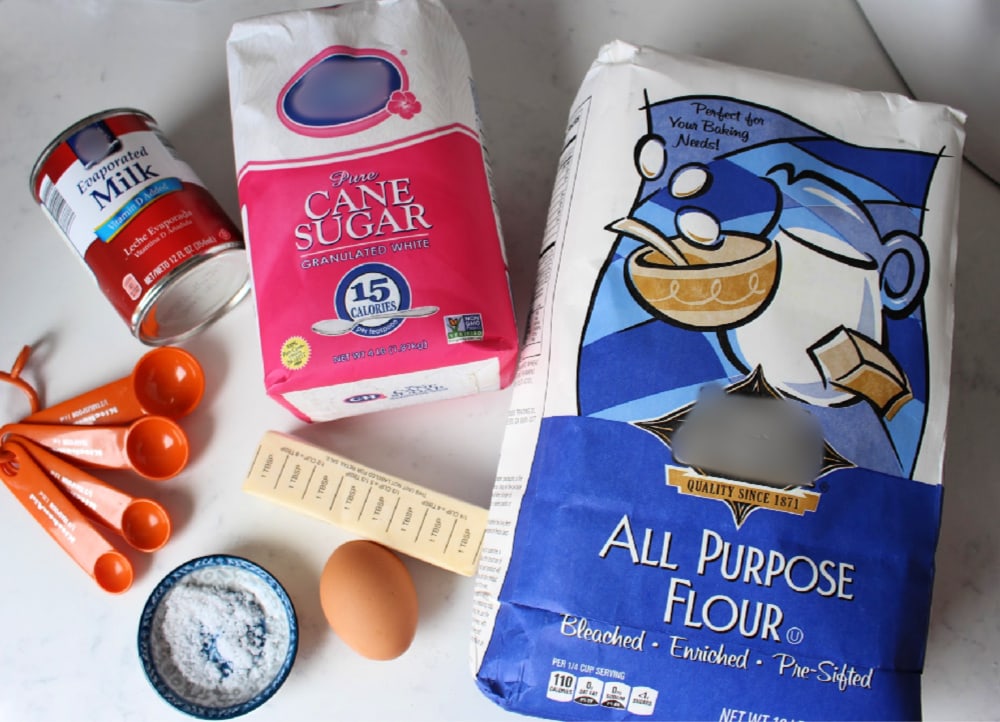
- Unsalted butter ONLY! Don’t use salted butter as it will kill the dry yeast, and the bread won’t rise.
- The butter has to be either room temperature or melted. Cold won’t fold when mixing.
- Instead of evaporated milk, you can substitute for regular milk.
- For a spongy bread, stick with all purpose flour, but you can use bread flour 1:1 as a substitute.
🥣 How to Make the Dough
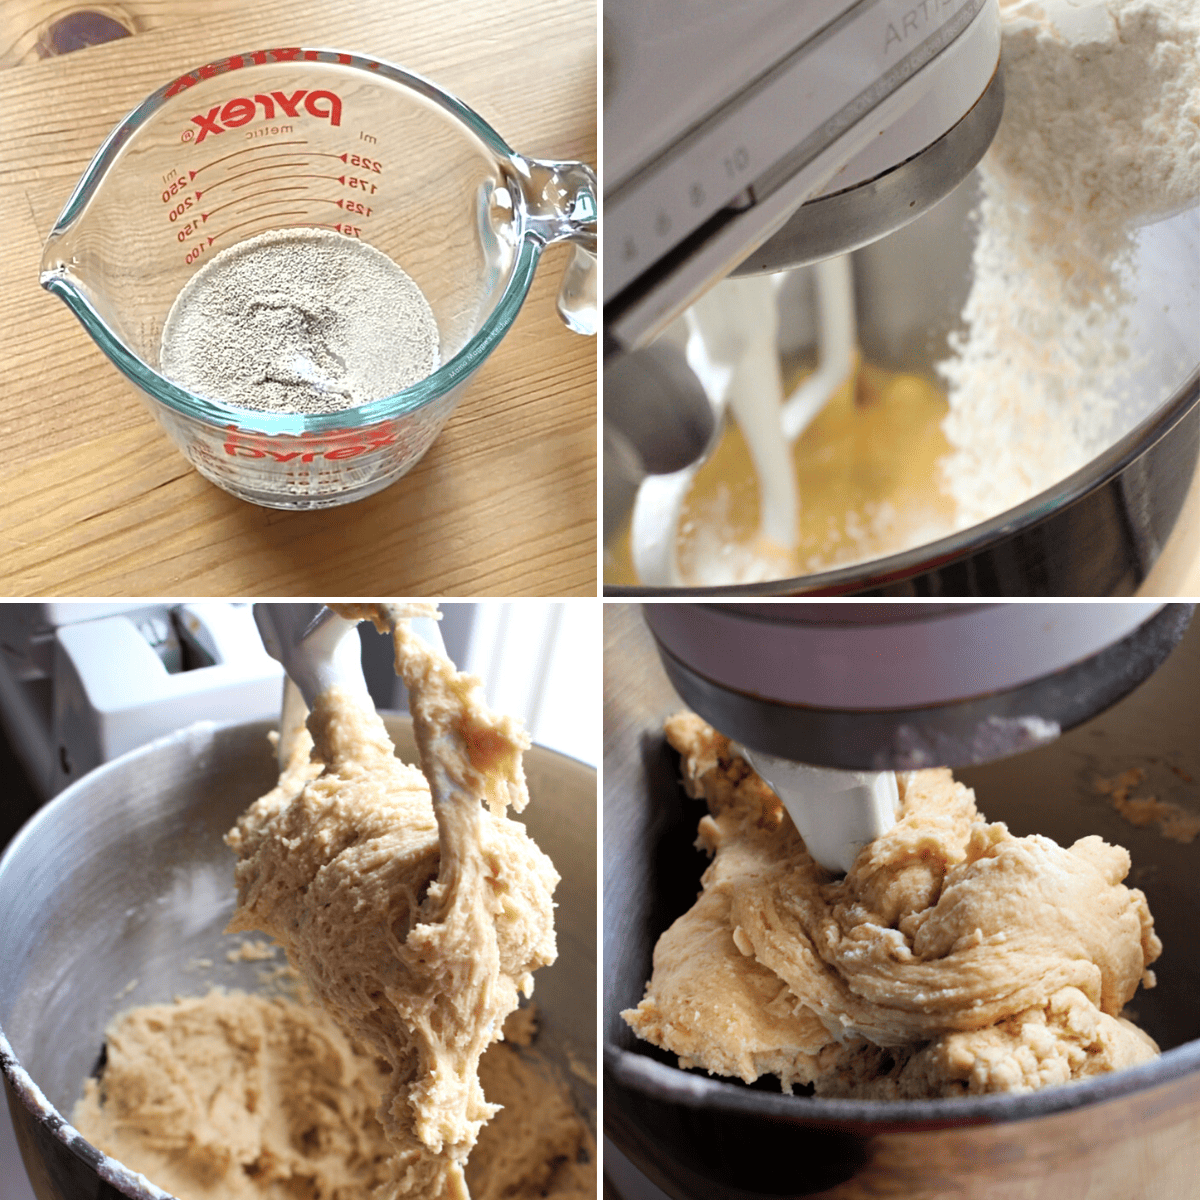
- Add warm water to the active dry yeast. Mix slightly. Set is aside until foamy.
- Add all of the dough ingredients to the bowl of a stand mixer EXCEPT FOR THE FLOUR.
- Mix on a low-medium speed.
- Then slowly add a little bit of the flour and mix on low speed.
- Stop the machine and add the remainder of the flour. Again mix on low.
🥖 Notes on Yeast
- Don’t use hot water to the yeast, or you will kill the beast. You can also use warm milk instead of water.
- Look at the expiration date on the yeast package. If it is expired, you can’t use it. Test the yeast by adding some to warm water. The yeast mixture should start to bubble after 5 minutes and good to use.
Yeast is also used when making Rosca de Reyes, Pan de Muerto, and other traditional Mexican pan dulce.
👩🏼🍳 Pro Tips
- I usually start with the paddle attachment. As the dough gets thicker, I switch to the dough hook attachment.
- Stop every so often and scrape the sides of the bowl.
- Be sure NOT to turn on the Kitchen Aid mixer or the hand mixer on high. Flour will go everywhere!
- You can use a regular hand mixer too. OR, do this by hand on a floured surface. It will take time to knead everything together.

- The dough should be elastic, soft, and should NOT stick to your hands.
- Place dough in a greased bowl. Turn it around so you can grease the bottom side too.
- Cover with plastic or a kitchen towel in a draft free place.
- Leave in a warm place. It will take roughly 2 hours for the dough to rise. It will double in size. In this case, size does matter. ⏰
Baking Notes
- This dough is needy. Wink. Wink. Be patient. It can take up to 15 minutes (sometimes 20 minutes) for the dough to come together.
- At first, it might look like the flour mixture will never come together, and you will be tempted to add more flour.
- DON’T ADD FLOUR, or your bread will dense.
- If after 20 minutes, the dough is not coming together, add 1 tablespoon flour and mix. Little by little, until it comes together.
How to Make the Sugar Topping
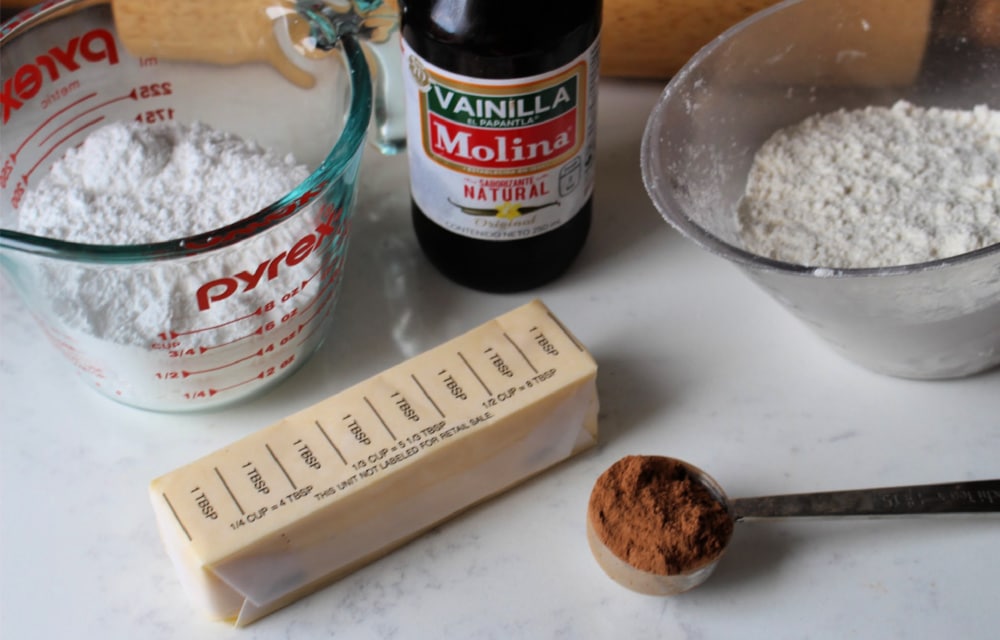
- Powder Sugar
- All Purpose Flour
- Butter
- Vanilla Extract
- Cocoa powder – for chocolate conchas
A good authentic Mexican conchas recipe will start with the vanilla topping.
From there you can change it to whatever you like: strawberry, chocolate, purple, etc.
Here, we are doing two types of toppings or flavoring – chocolate and vanilla.
How to Change the Color
- For yellow conchas, add a few drops of yellow food coloring to the sugar topping.
- For pink conchas, add a few drops of red food coloring.
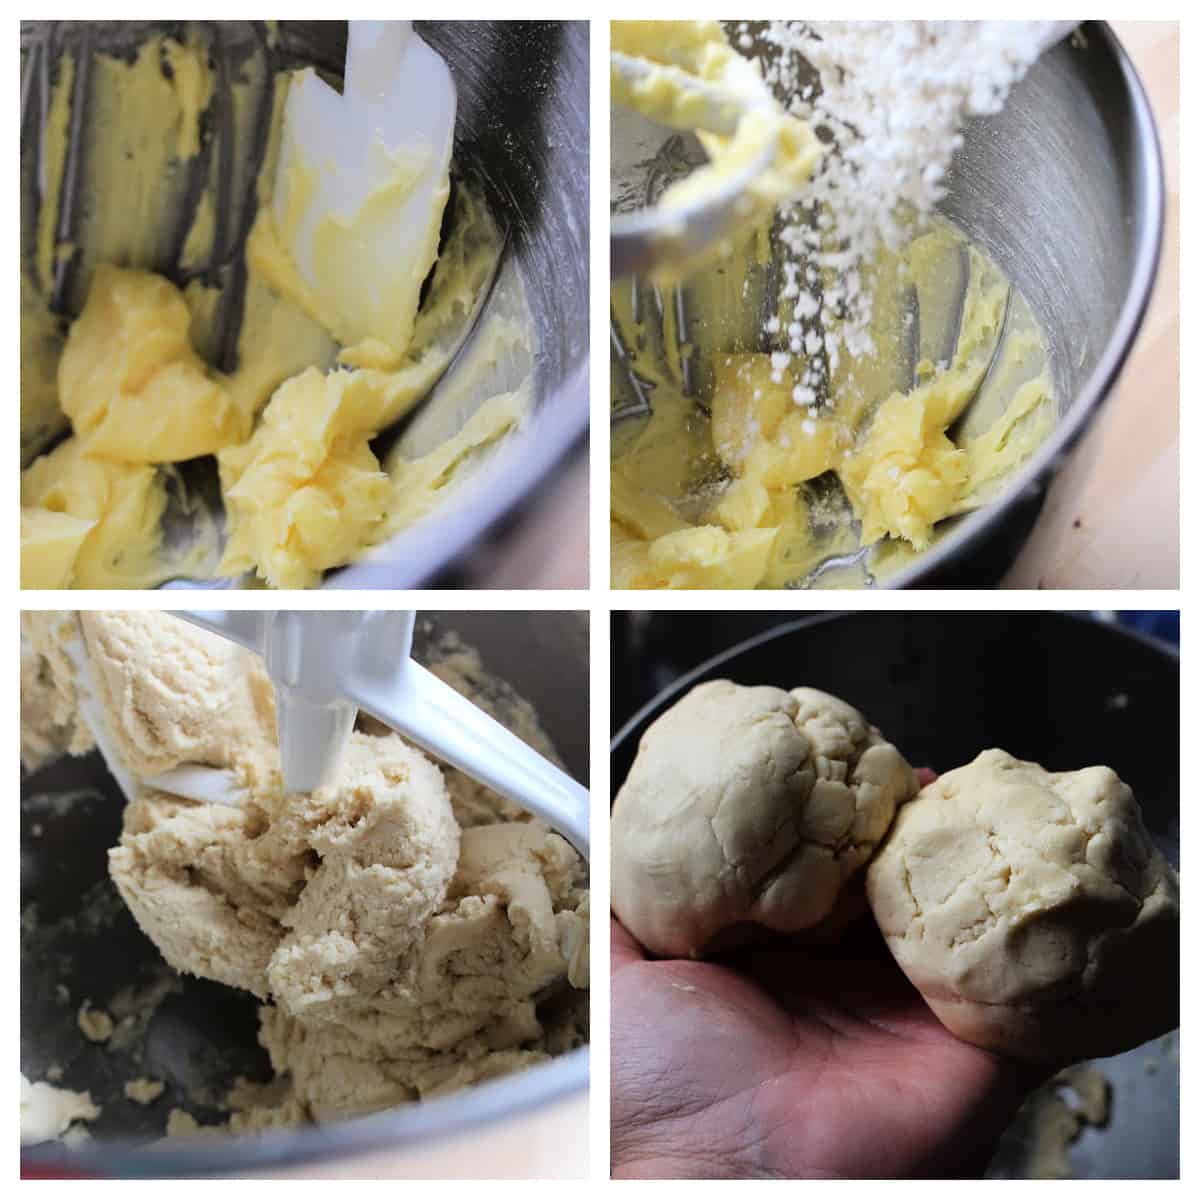
- Add softened butter to the mixer.
- Mix for 1 minute.
- Add powdered sugar and flour to the mixer.
- Blend until smooth.
- Divide the sugar topping into two balls to make chocolate conchas.
Be sure to scrape down the sides of the bowl with a rubber spatula.
After you add the flour, the topping mixture will have a wet sand texture. This is exactly what you want. By itself, the topping tastes really, really good.
If you are only making white Mexican conchas (or as some people in Mexico call them “Conchas de Novia”), do not add cocoa powder.
🍫 For Chocolate Conchas:
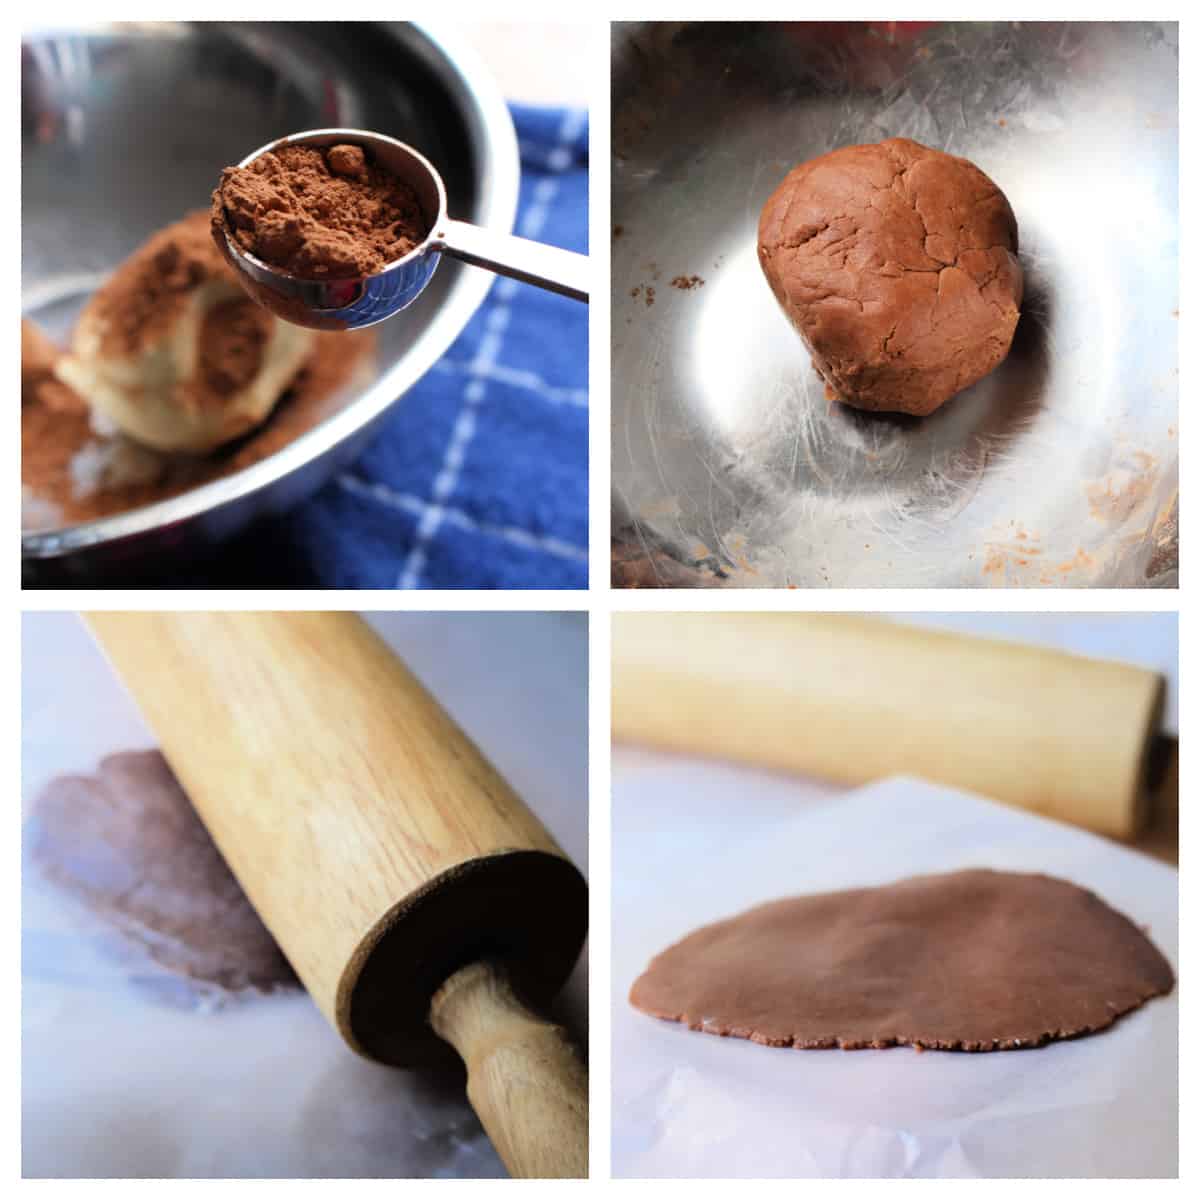
- To one of the topping balls, add the cocoa powder. Mix well.
- Take the sugar topping and roll out 6 chocolate balls and 6 vanilla balls.
- Place one of the balls between two pieces of wax papers (or parchment paper)
- Using a rolling pin, roll out the topping wide enough to cover the dough balls.
If you are making the topping using food coloring, use gloves. It tends to stain your hands.
Use your judgement here. Eyeball the size you need. You can also use a tortilla press to make the topping.
See how thick this is? Do not roll this out too thin or it will crumble before you are able to place it on the dough.
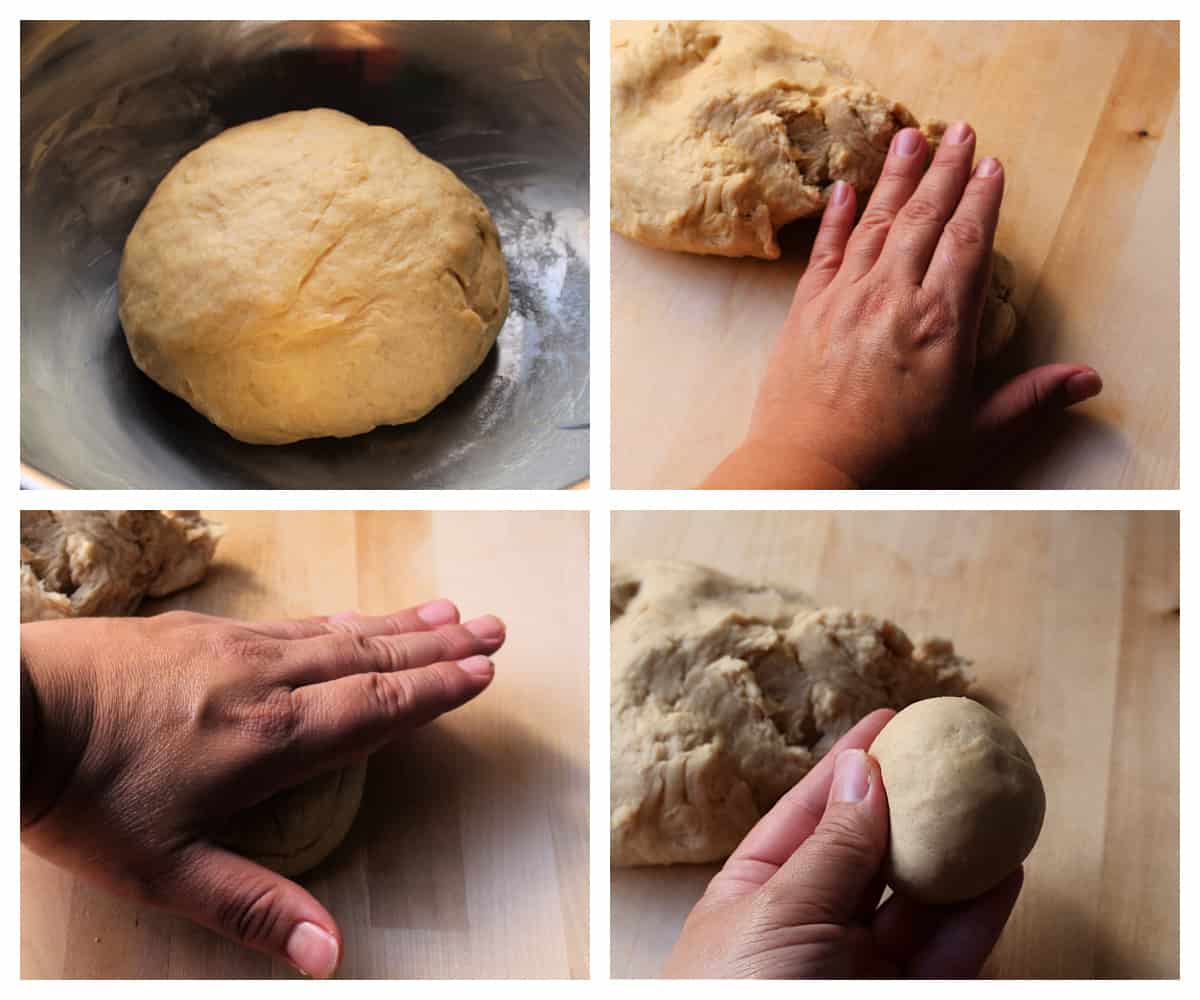
- Remove the plastic wrap or kitchen towel, and place on a wooden surface.
- Divide the dough into 12 equal portions, a little smaller than the size of a tennis balls.
- Roll out the dough ball until smooth.
Make sure they are the same size, or they will not bake evenly. Place the smooth balls on a greased baking sheet.
Separate them about 3 inches apart. They will expand when they are baking in the oven.
Pat them down with the back of your hand to flatten them out slightly.
- Grease the top of the balls with vegetable shortening or melted butter. It will help the sugar topping stick to the dough.
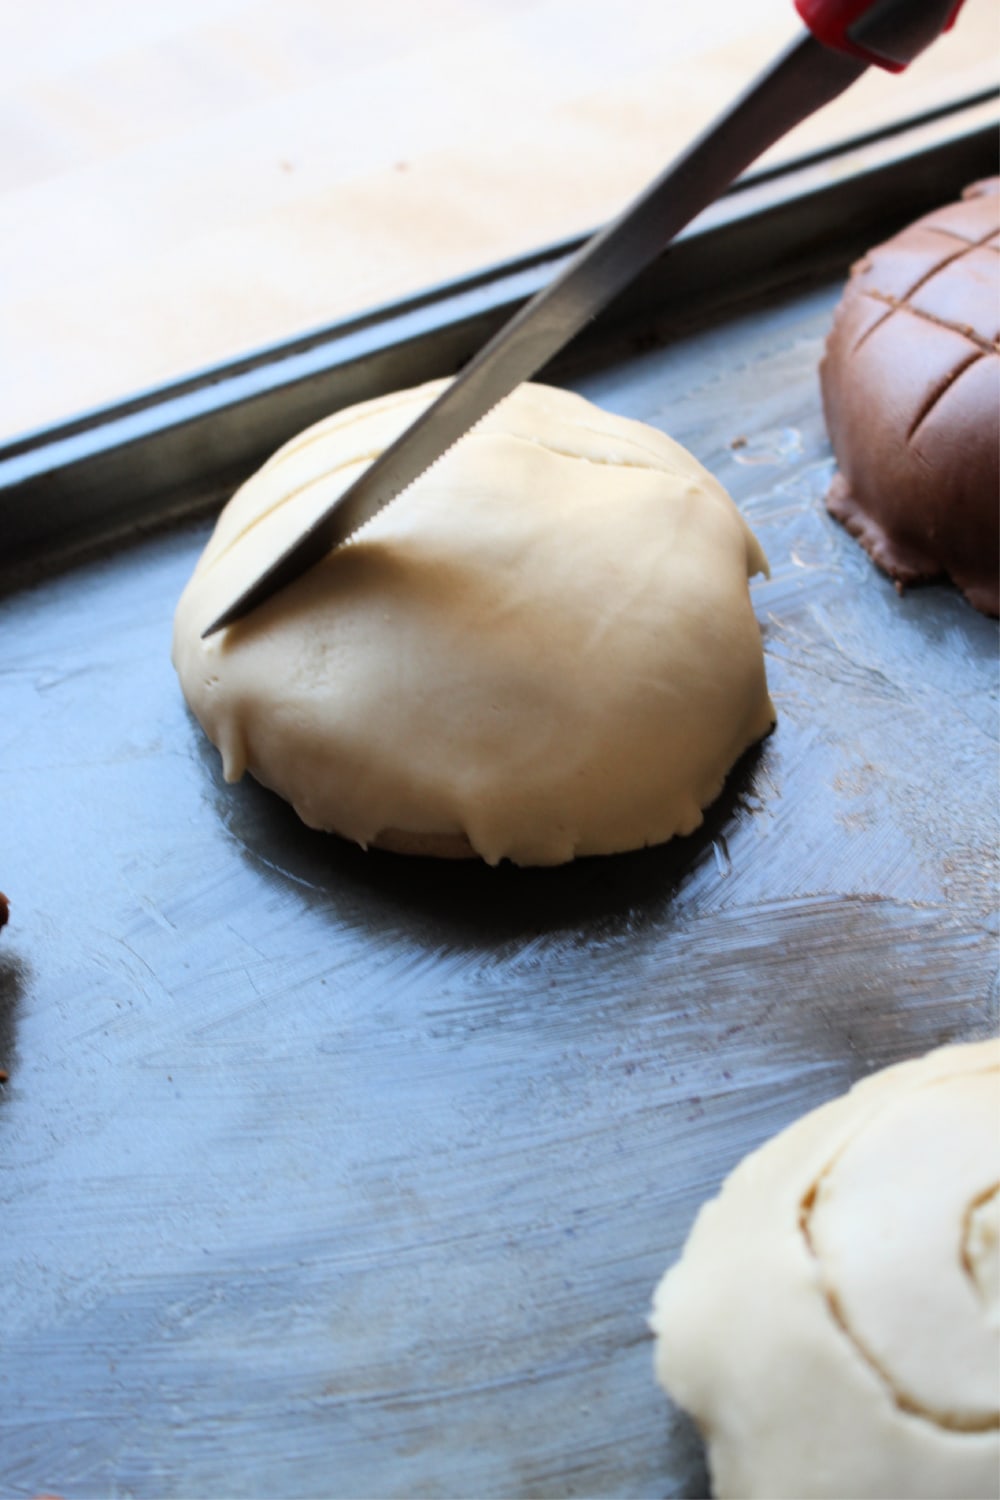
- Take the rolled out topping and gently place it on top of the dough balls.
I am using a sharp knife to create the pattern. If you use a knife, dip it in flour after each use. That way the knife will not stick to the topping.
You can also buy a conchas cutter online to create the sugar shell pattern. Same thing, dip the cutter in flour after each use for best results.
- Cover the conchas and proof for an additional 45 minutes to 1 hour.
- Then bake for 20 minutes.
Start early in the day so the dough has plenty of time to proof. You can also make the dough a day before. Simply store in your fridge, then bake the next day.
Storing Instructions
- Do NOT store Mexican sweet bread in the refrigerator. They will go stale faster.
- Best way to store pan dulce is at room temperature for 1-2 days in a plastic, sealable bag or an airtight container.
- You can freeze Mexican Conchas for longer storage, but they won’t be the same. If you are making conchas bread pudding, you can use frozen conchas.
- You can even freeze the dough. Thaw and bake later.
🍰 More Pan Dulce Recipes:
Pan Dulce, or Mexican Sweet Bread, can make strong men weep and children smile. Serve these soft and fluffy Mexican Conchas with coffee or milk for dunking.
They are a lot of work, but totally worth it. You can taste the love baked into every bite.
😋 Hungry for More?
Be sure to subscribe to my newsletter and follow along on Facebook, Instagram, Pinterest for my latest recipes and videos.
Did you make this recipe? Please rate the recipe below!
Mexican Conchas
Ingredients
For the Dough:
- 2 ½ teaspoons yeast
- ½ cup warm water
- ½ cup evaporated milk
- ⅓ cup white sugar
- 1 ½ teaspoon salt
- ⅓ cup unsalted butter or margarine softened or melted
- 1 egg
- 4 cups all-purpose flour
- ½ teaspoon ground cinnamon
For the Topping:
- ⅔ cup powdered sugar
- ½ cup butter or margarine
- 1 cup all-purpose flour
- 2 teaspoons ground cinnamon
- 1 teaspoon vanilla extract
- 1 tablespoon cocoa powder if using
Instructions
For the Dough:
- In a large bowl, stir together the yeast and warm water.
- Mix and set aside for 10 minutes.
- Add the evaporated milk, ⅓ cup sugar, salt, ⅓ cup butter, egg and 2 cups of the flour.
- Mix everything on medium speed.
- Stop mixing and scrape down the sides of the bowl.
- Gradually add in the remaining flour and ½ teaspoon cinnamon.
- Knead with the hook attachment for 10-15 minutes.
- Do not add more flour.
- Turn the dough out onto a floured counter.
- Place the dough in a greased bowl.
- Turn the dough to coat the bottom.
- Cover with plastic wrap or a kitchen towel.
- Let rise in a warm place until it has doubled in size. About 2 hours.
For the Topping:
- In a bowl, beat ⅔ cup powdered sugar and ½ cup butter until light and fluffy.
- Scrape the sides of the bowl, making sure to mix everything.
- Stir in the flour, cinnamon, and vanilla.
- Mix until the mixture is the consistency of a thick paste. It will look like wet sand.
- Divide into two parts, and place one part in a separate bowl.
- If making chocolate conchas, add cocoa powder to one of the bowls, and mix until fully incorporated.
- When the dough is done rising, divide into 12 pieces.
- Make sure the dough pieces are the same size, or they will not bake evenly.
- Shape the dough into balls.
- Place on a greased cookie sheet.
- Space the dough pieces out about 3 inches apart.
- Gently press them down with the back of your hand.
- Make 6 balls of the chocolate topping mixture and 6 balls of the white topping mixture.
- Place each ball between wax paper.
- Using a rolling pin, roll out the balls enough to cover the dough balls.
- Grease the top of the dough with melted butter, oil, or shortening.
- Place the rolled out topping on top of the dough balls.
- Pat down lightly.
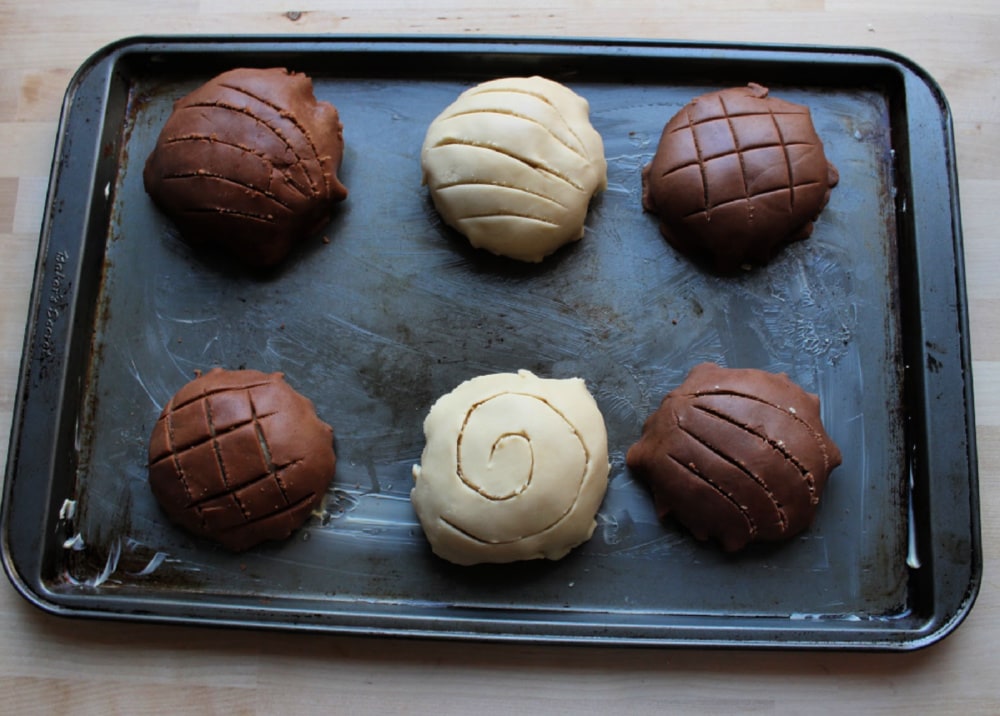
- Use a knife to cut the grooves in the topping like a shell or criss cross.
- Cover and let rise until doubled. About 45 minutes to an hour.
- Preheat the oven to 375 degrees F (190 degrees C).
- Bake for 20 minutes.
- Enjoy!


I’m so really impressed the way you give the information, so really detailed and i love all the photos as well so amazing. I love bread very much. Thank you for this wonderful sharing.
Awww… thank you. Conchas are easy for some people, but some people don’t know where to start. That’s why I try to be as specific as possible with my blog posts.
I love Mexican food but I’ve never heard of conchas before but now I need to try it, it sounds delicious.
Conchas is a type of Mexican sweet bread. Sooooo yummy. Especially in the morning with some coffee… Hope you get to try them one day!
I never knew about this type of bread. It looks absolutely delicious though! 🙂 This recipe is really well written and easy to follow, and the photos makes it look even more appetising. Thank you for sharing 🙂
Thank you. Conchas is a type of Mexican sweet bread. Super delicious. I know how hard it can be for some people to make certain foods. That’s why I try to be as detailed as possible and make videos when I can. Less time figuring out what to cook, and more happy times eating. Words to live by. lol.
You sounds super amazing in this post. There is so much information on the ingredients. Just need to apply when I go to kitchen.
Thank you. I try to add as much information to my blog posts. Hope you get a chance to try out this conchas recipe.
I remember when I was a little girl in Mexico, I would go to our local little grocery store . Every day I would buy 2 Conchas, one for my Abuelita and one for me. Brings back so many good memories ! I certainly will try your recipe . Thank you !
Love those memories. Hope you try this recipe it’s delicious!
Never heard of Conchas before. Would love to try anytime soon!
You so should! These conchas are to die for… with a warm cup of tea or coffee, of course. 🙂
Hi.
We just love mexican food at our home and, that looks so good!!! Will trie for sure.
That’s great! Mexican food for the win!! 🙂
These look delicious. It actually looks similar to something I saw in Japan called melonpan which I didn’t try because of the name, but not regret it after looking up what it was.
I gotta Google that. I’m always curious to find out about similar foods. These conchas is a type of sweet bread that we have in Mexico. They were brought over by the French.
This looks so delicious! I really love how you included so many photos of the process. It makes gives me the type of help o need to try a new recipe.
I want to make sure people know how to make conchas the easy way. Really, they aren’t that hard to make, but some people are intimidated. I hope to take away the fear with these step-by-step pictures and video.
Wow these look so good!! I can’t wait to make them myself. Thanks for sharing.
Awesome! Hope you enjoy your conchas. 🙂
Wow these look so tasty! I would love to try out this recipe!
Blush… thank you for the compliment. I love conchas!
Wow, that looks yummy! Thanks for sharing the recipe, will give this a try soon! 🙂
Yes! Please do. These conchas are so yummy!
Oh wow! These look so good. I have never tried them before. I am going to be doing a bit of baking myself later on today.
Baking is fun during the winter months. Hope you decide to give these conchas a try. They’re really not that hard to make.
Wow, I have never tried to make a conchas and this recipe looks really delicious and easy. I will try to make this for my kids, thanks for sharing!
Your kids will love you for it. Conchas are so good, and they’re not hard to make. The video is a great step-by-step tutorial.
My kids would absolutely love these. This would disappear in no time at our house! This is my kind of weekend treat.
Lol. Sounds like my house. My son and husband ate all the conchas as soon as they were cool enough to eat!
Wow, that looks so delicious and easy to follow. When you love the bread, it is really worth the wait and effort.
I completely agree. Baking conchas is a lot of fun too. Especially if you have little kids. They love to bake.
I always wondered how to make Conchas. With how detailed your pictures and your instructions are, I can now become an expert. Thank you very much
Aww.. That’s so sweet. Freshly baked conchas are the best. Happy baking!
I love how detailed your instructions are. I can’t tell you how many times I’ve had no-brainer questions that I’ve been afraid to ask while doing a recipe. Very helpful!
That’s exactly why I did a step-by-step tutorial and video. I know people are afraid of trying something new like conchas. Conchas can be difficult for some people, but they really are very easy to make and bake.
the bread sounds delicious. i love your photos.
joy at http://www.thejoyousliving.com
I love how detailed this is. Baking is not my strong point so it’s nice to have a walk-through x
Yes. That’s why I did the step-by-step on this Conchas recipe for people who are not bakers.
Can my bread machine do the work for me instead of using kitchen aid? Also, do I let the yeast rise of add all ingredients together?
-Irene (New to baking)
I’ve never tried making conchas in a bread machine. I would mix the yeast and the water. Let it sit for a minute while you’re getting all the ingredients together. Then add the ingredients, but there’s no real need to let it rise.