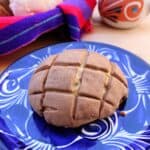
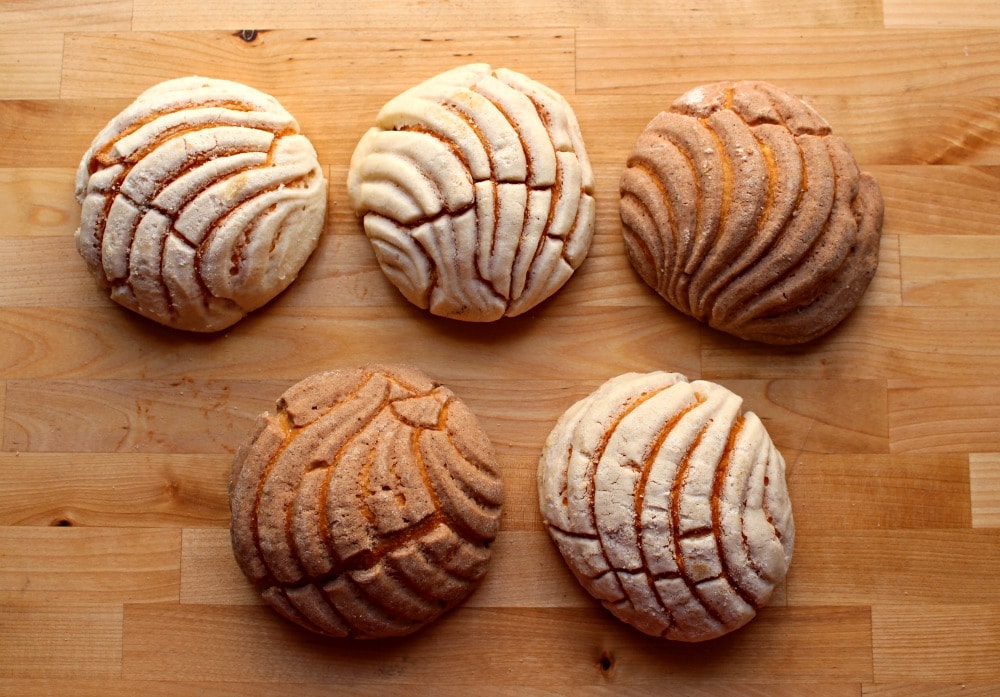
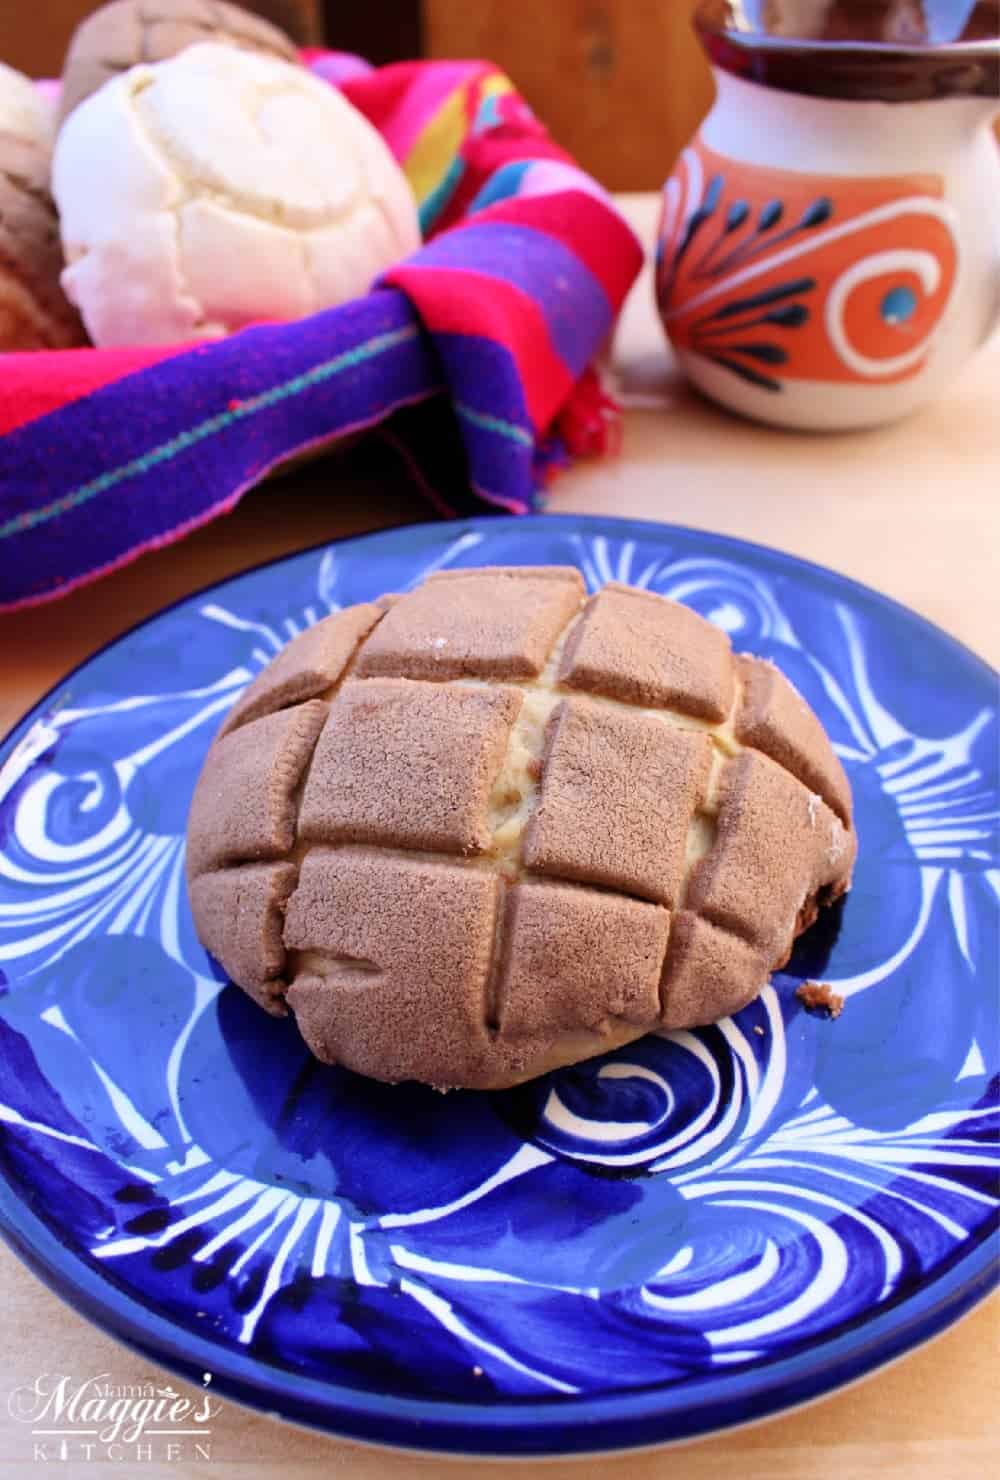
Mexican Conchas are soft and yummy sweet bread roll with a shell-shaped sugar topping.
In Spanish, “concha” means “shell” 🐚 which is where this dessert bread gets its name.
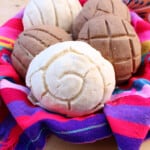
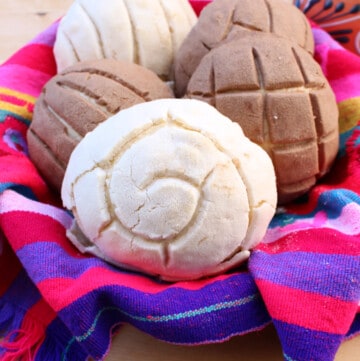
Among all the Mexican sweet breads, this is undoubtedly the most popular.
They are easily found at any and all Mexican bakeries. Enjoyed with hot chocolate or a cup of coffee morning, day, or night.
Table of Contents
Ingredients for the Dough
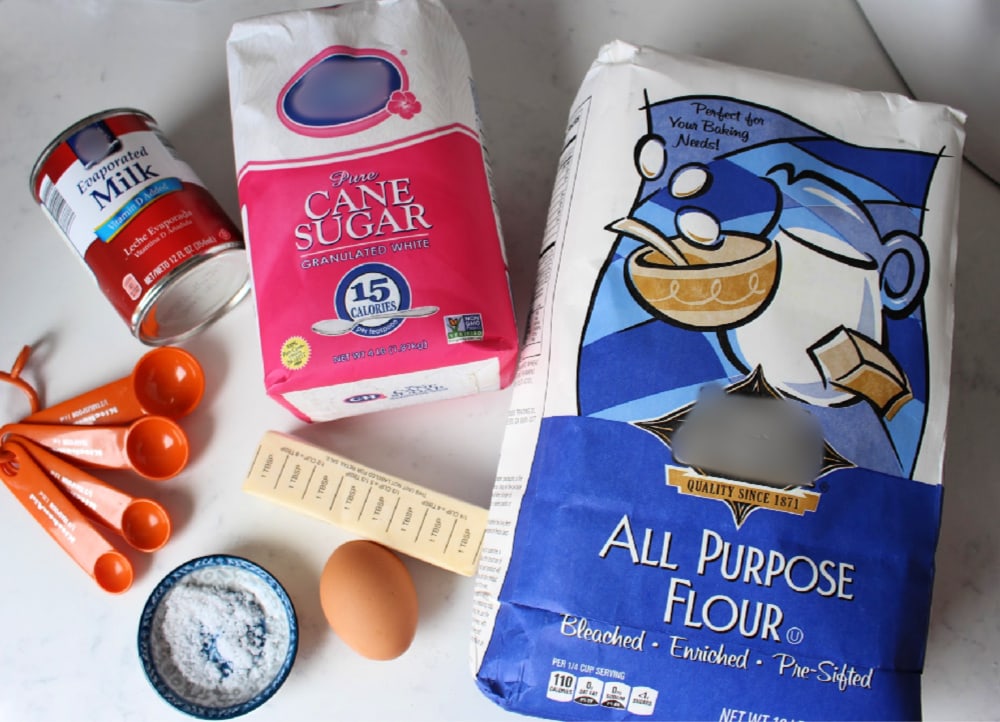
- Unsalted butter ONLY! Don’t use salted butter as it will kill the dry yeast, and the bread won’t rise.
- The butter has to be either room temperature or melted. Cold won’t fold when mixing.
- Instead of evaporated milk, you can substitute for regular milk.
- For a spongy bread, stick with all purpose flour, but you can use bread flour 1:1 as a substitute.
🥣 How to Make the Dough
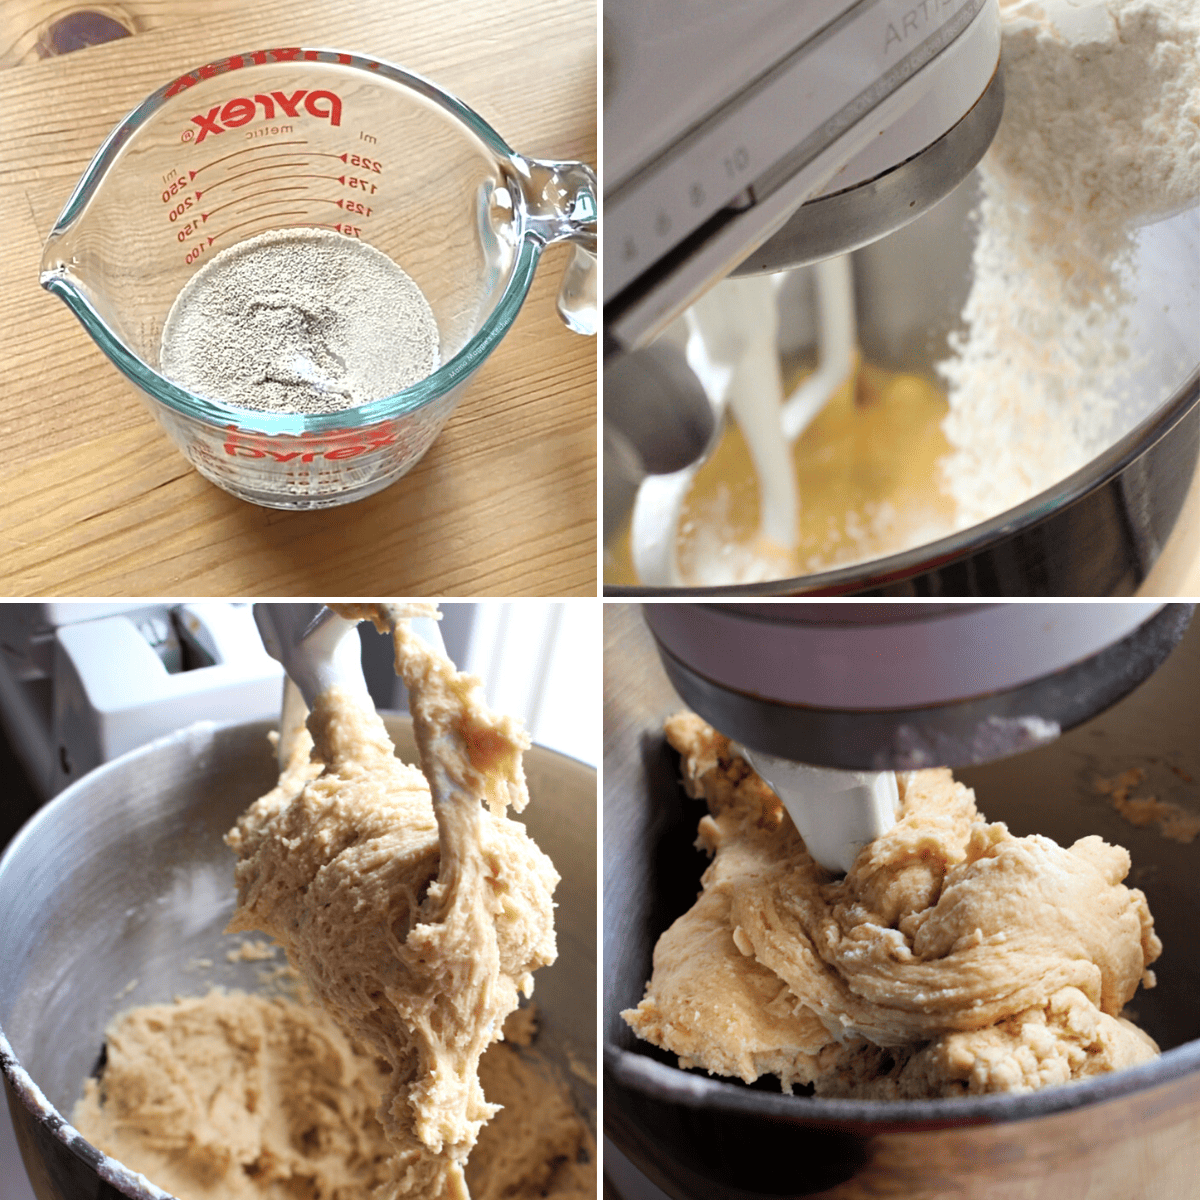
- Add warm water to the active dry yeast. Mix slightly. Set is aside until foamy.
- Add all of the dough ingredients to the bowl of a stand mixer EXCEPT FOR THE FLOUR.
- Mix on a low-medium speed.
- Then slowly add a little bit of the flour and mix on low speed.
- Stop the machine and add the remainder of the flour. Again mix on low.
🥖 Notes on Yeast
- Don’t use hot water to the yeast, or you will kill the beast. You can also use warm milk instead of water.
- Look at the expiration date on the yeast package. If it is expired, you can’t use it. Test the yeast by adding some to warm water. The yeast mixture should start to bubble after 5 minutes and good to use.
Yeast is also used when making Rosca de Reyes, Pan de Muerto, and other traditional Mexican pan dulce.
👩🏼🍳 Pro Tips
- I usually start with the paddle attachment. As the dough gets thicker, I switch to the dough hook attachment.
- Stop every so often and scrape the sides of the bowl.
- Be sure NOT to turn on the Kitchen Aid mixer or the hand mixer on high. Flour will go everywhere!
- You can use a regular hand mixer too. OR, do this by hand on a floured surface. It will take time to knead everything together.

- The dough should be elastic, soft, and should NOT stick to your hands.
- Place dough in a greased bowl. Turn it around so you can grease the bottom side too.
- Cover with plastic or a kitchen towel in a draft free place.
- Leave in a warm place. It will take roughly 2 hours for the dough to rise. It will double in size. In this case, size does matter. ⏰
Baking Notes
- This dough is needy. Wink. Wink. Be patient. It can take up to 15 minutes (sometimes 20 minutes) for the dough to come together.
- At first, it might look like the flour mixture will never come together, and you will be tempted to add more flour.
- DON’T ADD FLOUR, or your bread will dense.
- If after 20 minutes, the dough is not coming together, add 1 tablespoon flour and mix. Little by little, until it comes together.
How to Make the Sugar Topping
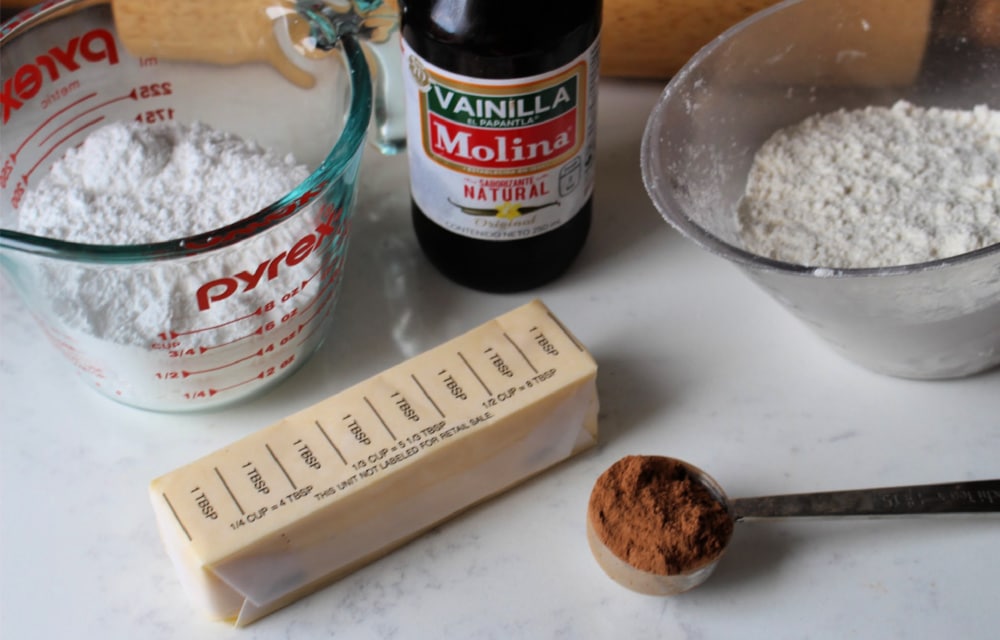
- Powder Sugar
- All Purpose Flour
- Butter
- Vanilla Extract
- Cocoa powder – for chocolate conchas
A good authentic Mexican conchas recipe will start with the vanilla topping.
From there you can change it to whatever you like: strawberry, chocolate, purple, etc.
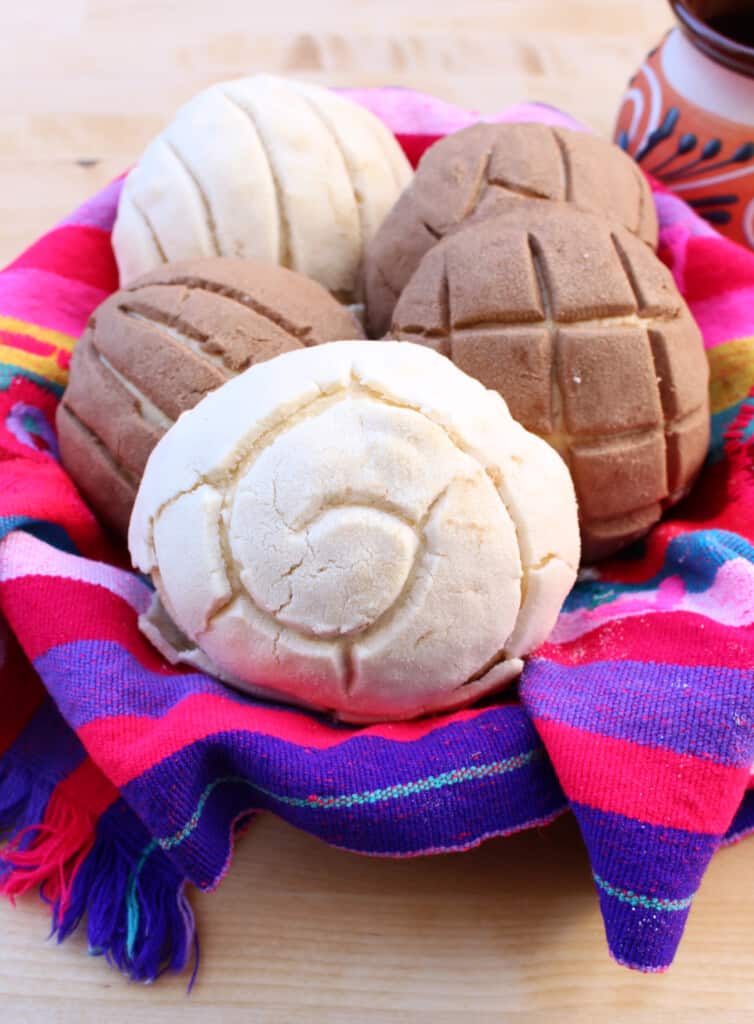
Here, we are doing two types of toppings or flavoring – chocolate and vanilla.
How to Change the Color
- For yellow conchas, add a few drops of yellow food coloring to the sugar topping.
- For pink conchas, add a few drops of red food coloring.
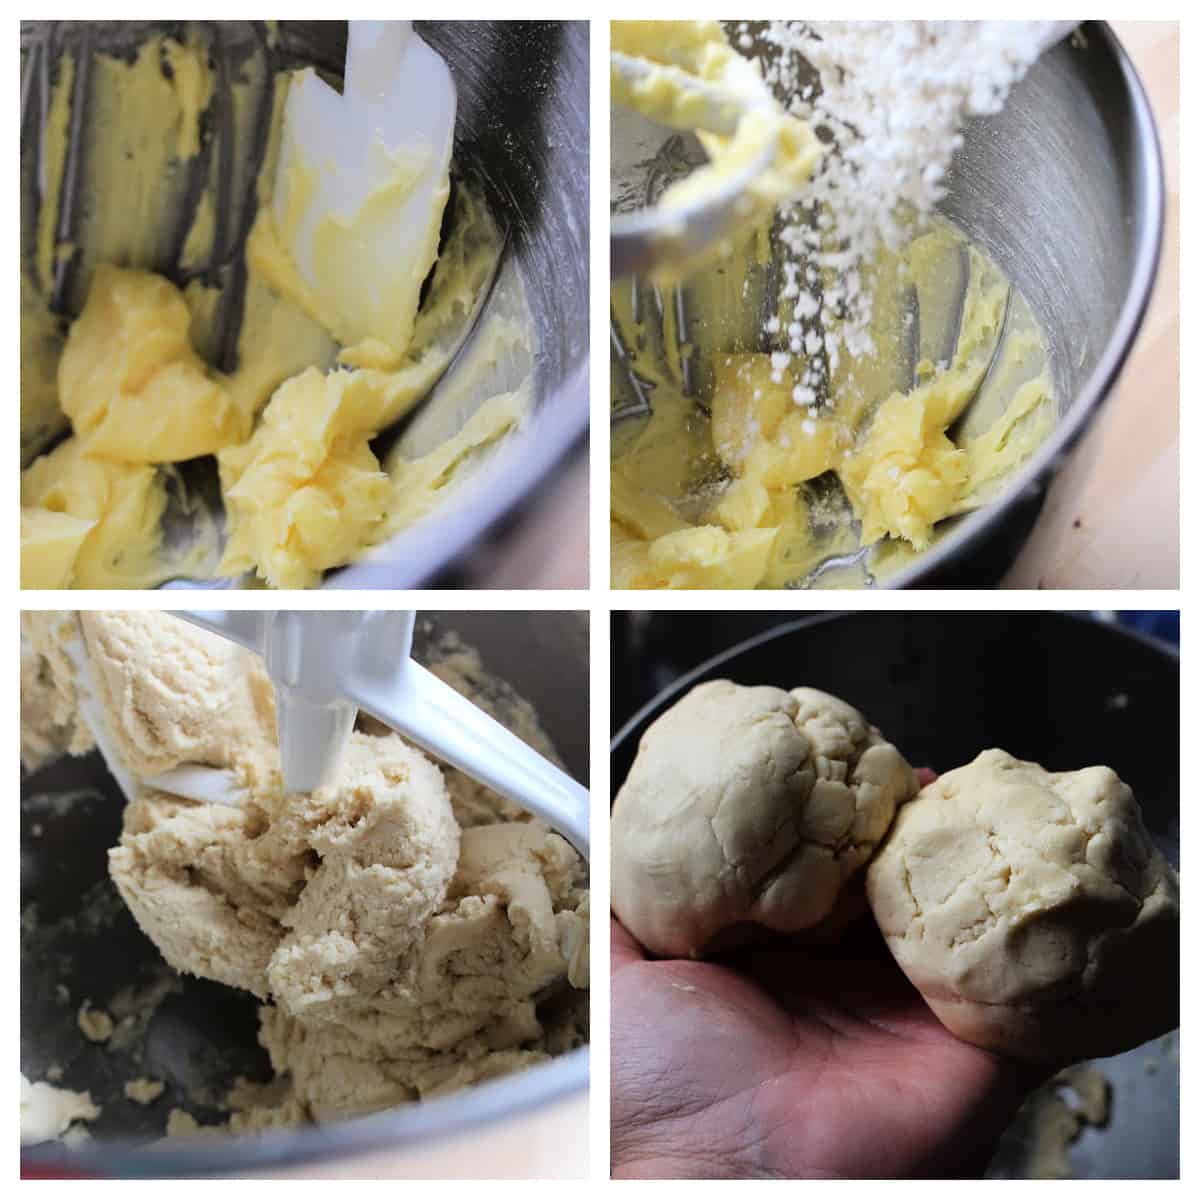
- Add softened butter to the mixer.
- Mix for 1 minute.
- Add powdered sugar and flour to the mixer.
- Blend until smooth.
- Divide the sugar topping into two balls to make chocolate conchas.
Be sure to scrape down the sides of the bowl with a rubber spatula.
After you add the flour, the topping mixture will have a wet sand texture. This is exactly what you want. By itself, the topping tastes really, really good.
If you are only making white Mexican conchas (or as some people in Mexico call them “Conchas de Novia”), do not add cocoa powder.
🍫 For Chocolate Conchas:
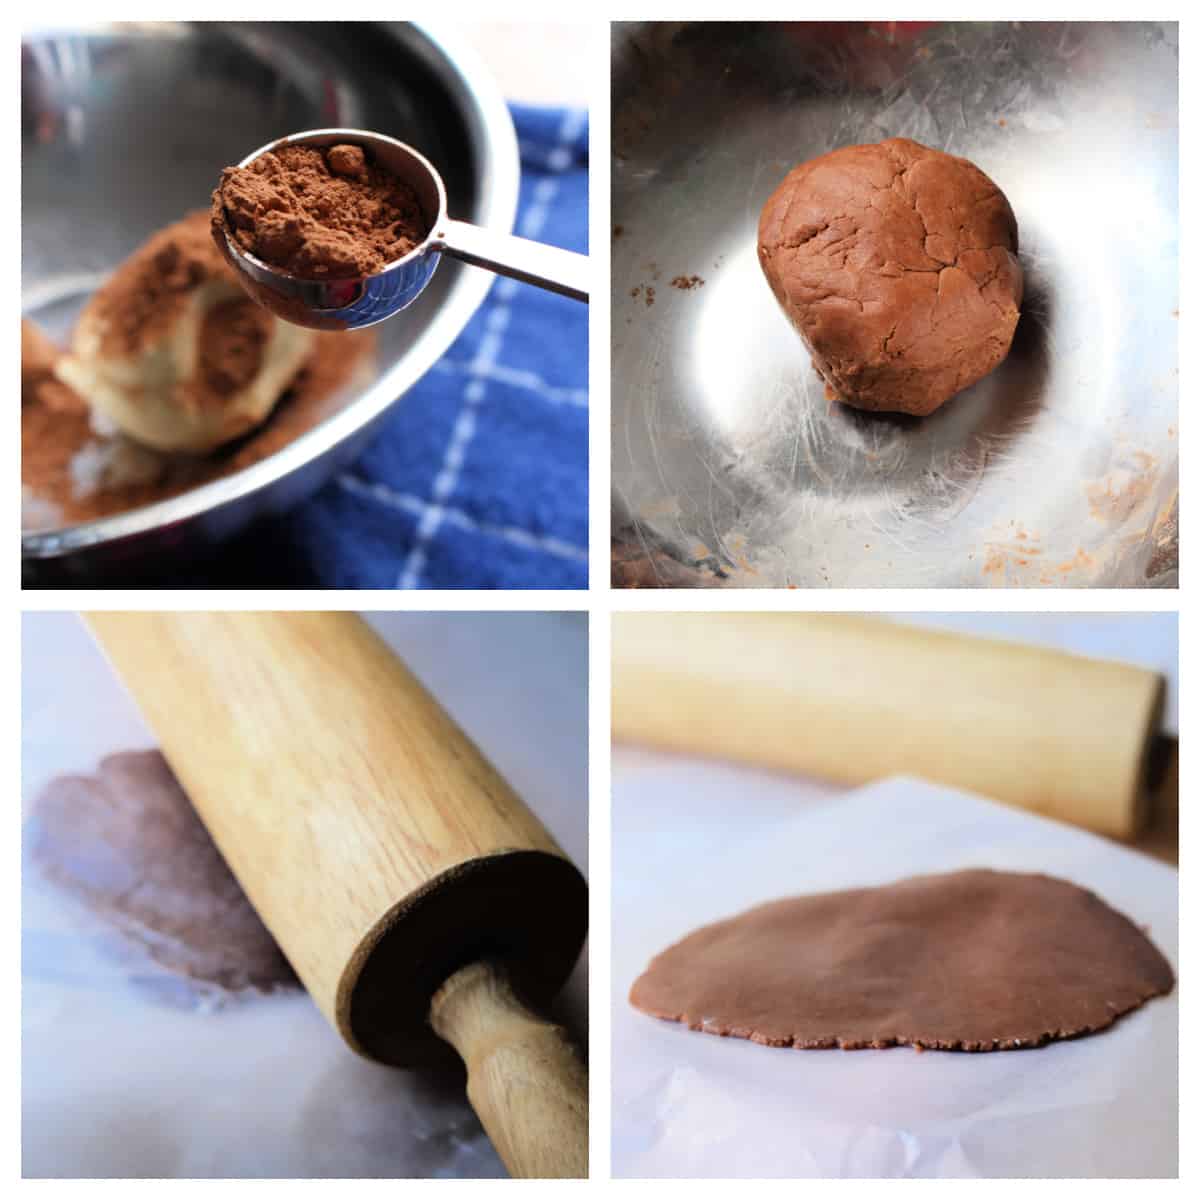
- To one of the topping balls, add the cocoa powder. Mix well.
- Take the sugar topping and roll out 6 chocolate balls and 6 vanilla balls.
- Place one of the balls between two pieces of wax papers (or parchment paper)
- Using a rolling pin, roll out the topping wide enough to cover the dough balls.
If you are making the topping using food coloring, use gloves. It tends to stain your hands.
Use your judgement here. Eyeball the size you need. You can also use a tortilla press to make the topping.
See how thick this is? Do not roll this out too thin or it will crumble before you are able to place it on the dough.
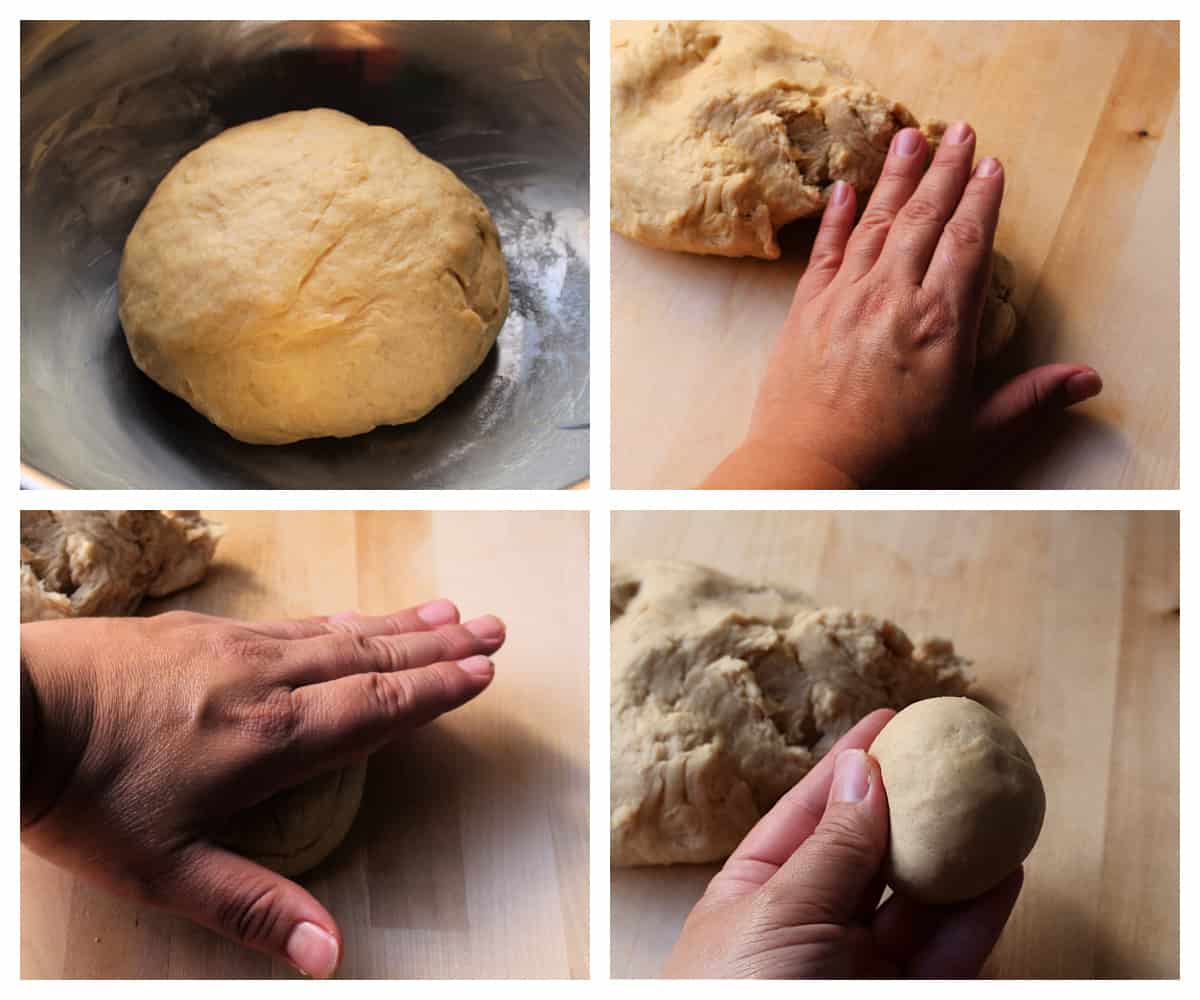
- Remove the plastic wrap or kitchen towel, and place on a wooden surface.
- Divide the dough into 12 equal portions, a little smaller than the size of a tennis balls.
- Roll out the dough ball until smooth.
Make sure they are the same size, or they will not bake evenly. Place the smooth balls on a greased baking sheet.
Separate them about 3 inches apart. They will expand when they are baking in the oven.
Pat them down with the back of your hand to flatten them out slightly.
- Grease the top of the balls with vegetable shortening or melted butter. It will help the sugar topping stick to the dough.
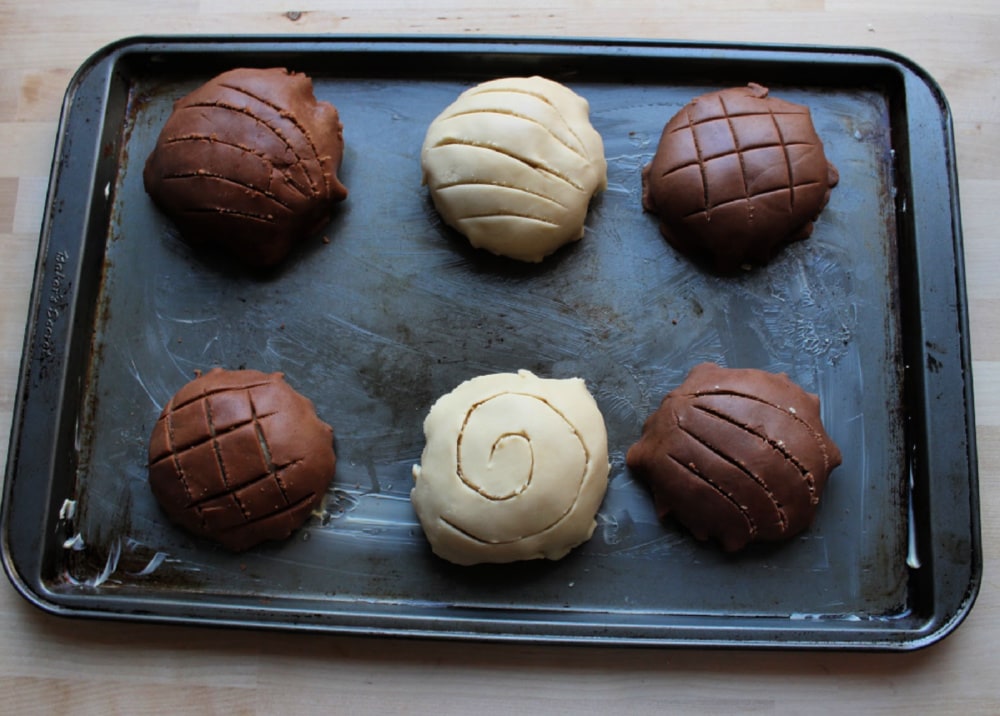
- Take the rolled out topping and gently place it on top of the dough balls.
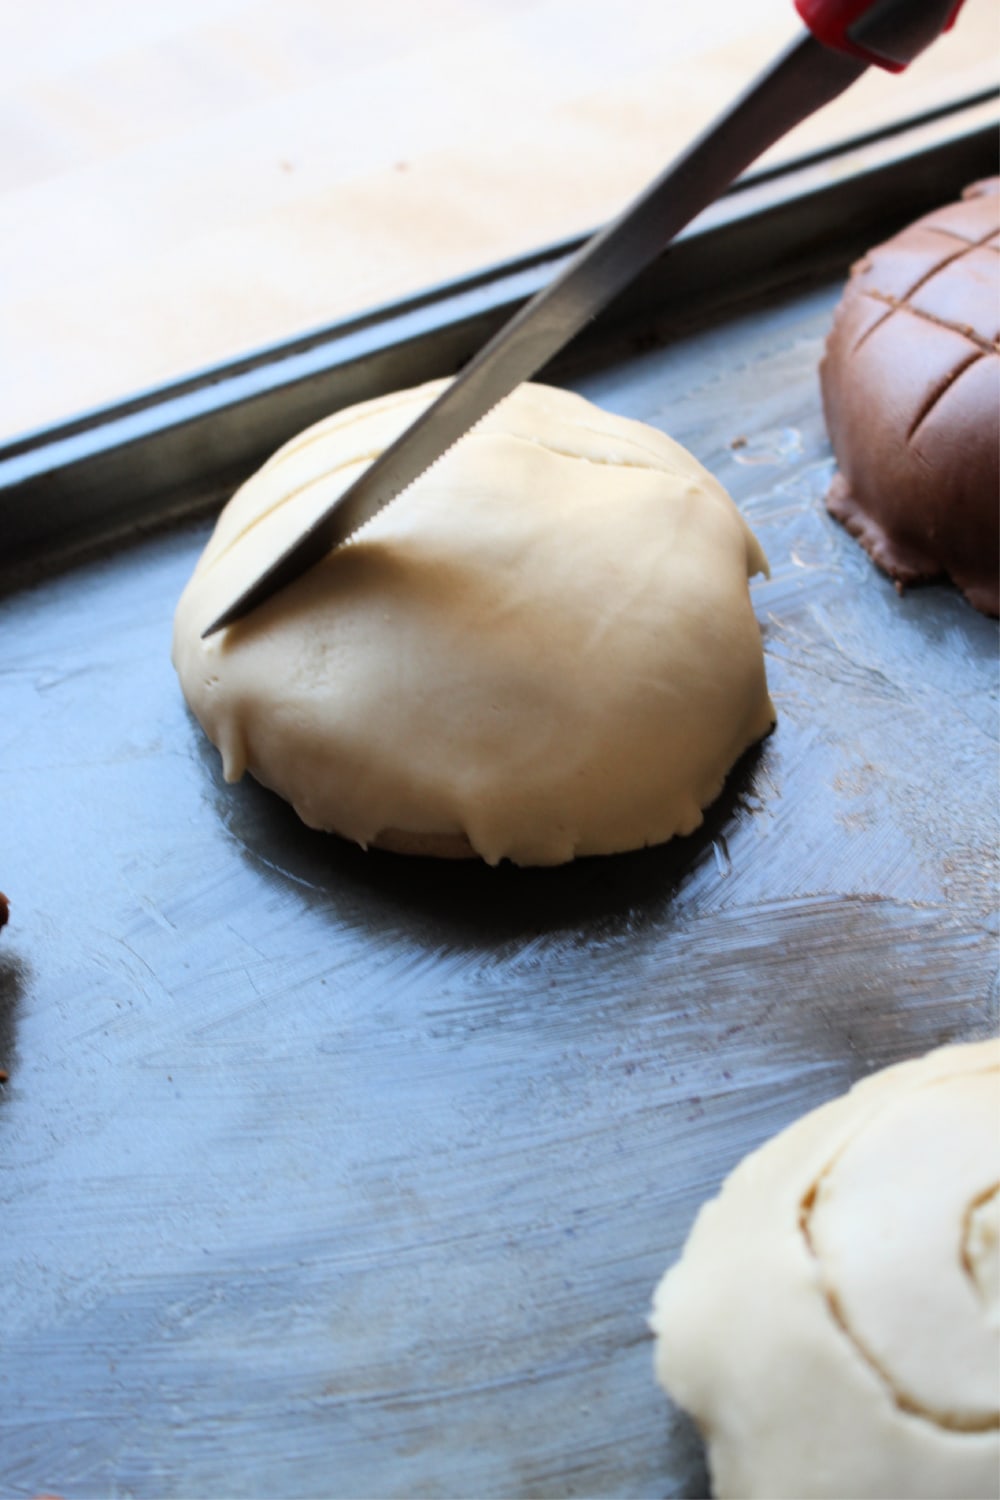
I am using a sharp knife to create the pattern. If you use a knife, dip it in flour after each use. That way the knife will not stick to the topping.
You can also buy a conchas cutter online to create the sugar shell pattern. Same thing, dip the cutter in flour after each use for best results.
- Cover the conchas and proof for an additional 45 minutes to 1 hour.
- Then bake for 20 minutes.
Start early in the day so the dough has plenty of time to proof. You can also make the dough a day before. Simply store in your fridge, then bake the next day.
Storing Instructions
- Do NOT store Mexican sweet bread in the refrigerator. They will go stale faster.
- Best way to store pan dulce is at room temperature for 1-2 days in a plastic, sealable bag or an airtight container.
- You can freeze Mexican Conchas for longer storage, but they won’t be the same. If you are making conchas bread pudding, you can use frozen conchas.
- You can even freeze the dough. Thaw and bake later.
🍰 More Pan Dulce Recipes:
Pan Dulce, or Mexican Sweet Bread, can make strong men weep and children smile. Serve these soft and fluffy Mexican Conchas with coffee or milk for dunking.
They are a lot of work, but totally worth it. You can taste the love baked into every bite.
😋 Hungry for More?
Be sure to subscribe to my newsletter and follow along on Facebook, Instagram, Pinterest for my latest recipes and videos.
Did you make this recipe? Please rate the recipe below!
Mexican Conchas
Ingredients
For the Dough:
- 2 ½ teaspoons yeast
- ½ cup warm water
- ½ cup evaporated milk
- ⅓ cup white sugar
- 1 ½ teaspoon salt
- ⅓ cup unsalted butter or margarine softened or melted
- 1 egg
- 4 cups all-purpose flour
- ½ teaspoon ground cinnamon
For the Topping:
- ⅔ cup powdered sugar
- ½ cup butter or margarine
- 1 cup all-purpose flour
- 2 teaspoons ground cinnamon
- 1 teaspoon vanilla extract
- 1 tablespoon cocoa powder if using
Instructions
For the Dough:
- In a large bowl, stir together the yeast and warm water.
- Mix and set aside for 10 minutes.
- Add the evaporated milk, ⅓ cup sugar, salt, ⅓ cup butter, egg and 2 cups of the flour.
- Mix everything on medium speed.
- Stop mixing and scrape down the sides of the bowl.
- Gradually add in the remaining flour and ½ teaspoon cinnamon.
- Knead with the hook attachment for 10-15 minutes.
- Do not add more flour.
- Turn the dough out onto a floured counter.
- Place the dough in a greased bowl.
- Turn the dough to coat the bottom.
- Cover with plastic wrap or a kitchen towel.
- Let rise in a warm place until it has doubled in size. About 2 hours.
For the Topping:
- In a bowl, beat ⅔ cup powdered sugar and ½ cup butter until light and fluffy.
- Scrape the sides of the bowl, making sure to mix everything.
- Stir in the flour, cinnamon, and vanilla.
- Mix until the mixture is the consistency of a thick paste. It will look like wet sand.
- Divide into two parts, and place one part in a separate bowl.
- If making chocolate conchas, add cocoa powder to one of the bowls, and mix until fully incorporated.
- When the dough is done rising, divide into 12 pieces.
- Make sure the dough pieces are the same size, or they will not bake evenly.
- Shape the dough into balls.
- Place on a greased cookie sheet.
- Space the dough pieces out about 3 inches apart.
- Gently press them down with the back of your hand.
- Make 6 balls of the chocolate topping mixture and 6 balls of the white topping mixture.
- Place each ball between wax paper.
- Using a rolling pin, roll out the balls enough to cover the dough balls.
- Grease the top of the dough with melted butter, oil, or shortening.
- Place the rolled out topping on top of the dough balls.
- Pat down lightly.
- Use a knife to cut the grooves in the topping like a shell or criss cross.
- Cover and let rise until doubled. About 45 minutes to an hour.
- Preheat the oven to 375 degrees F (190 degrees C).
- Bake for 20 minutes.
- Enjoy!


Could you add a picture of the inside as well? I like to know what kind of consistency my bread will have at the end? Or if you have a any other social media places where those pictures would be that I could take a look there?
The inside of the bread once it’s been baked? You’re right I don’t have a picture of that. I’ll have to add it.
Wow! These are wonderful. Followed the recipe as written and they came out exactly as advertised. No need for me to continue my search for the perfect conchas recipe…this is it!
That’s so great to hear! Glad you found this recipe for Mexican conchas. Thanks for your comments and the 5 stars!
Can these be frozen? I have not used your recipe yet, but will in the next day or two. In the past I have had trouble with the topping falling off when you bite into it.
Yes, you can freeze up to 3 months. I would freeze the bread and make the toppings the day of. Exactly what you described, if you freeze it with the topping, it’ll just crumble.
Very excited to try them. Just put them in the oven 🤞
Hope they turn out perfect. Provecho!!
Made conchas last week and am using the recipe to make a rosca this week.
Very good, super soft right out of the oven. I think they were a tad dense when cooled the first time so i’m extending the time for resting/rising this time.
Does the topping also keep in the fridge or will i need to make a new batch?
Hi there. Glad you liked my conchas recipe. If your conchas came out too dense, it means that you might have added too much flour or the dough wasn’t allowed to proof long enough. As for the topping, I highly recommend making it that day. It will crumble easily especially if you put it in the fridge. Hope this helps!
I’d like to start off by saying thank you for taking the time to create this recipe and the video! Made these today and they were a big hit. The bread bit was soft and a bit dense as I used bread flour, but still perfect none the less. The sugar topping was good…once the correct ingredients and amounts were incorporated. The amounts listed and the instructions were not totally accurate and a bit confusing. If you’re making these, please watch her video and pay close attention to her picture above the sugar topping breakdown with the measuring cups! I sadly had to toss a batch out as it did not become the “wet sand paste” consistency. I also didn’t add cinnamon to the topping either. Thanks again!
I’m glad to hear that the recipe and video were helpful in making these delicious treats. Hope you make this Conchas recipe again soon!
I’ve been making your recipe and it’s awesome! Question though, when I mix the water and yeast, is it suppose to bubble? Mine doesn’t!
Yes. Yeast is supposed to bubble. That’s when you know the yeast is active. If no bubbles, that means the yeast is dead.
Have you ever attempted to use Gluten Free flour for this recipe? It sounds AMAZING!
I’ve never tried it with gluten free flour. Let me know if you do. I’d love to hear what you thought.
Can you use instant/rapid yeast instead of active dry yeast?
Yes, you can substitute instant (or rapid-rise) yeast for active dry yeast at a 1:1 ratio. However, you need to skip the “blooming” step. Just whisk the instant yeast directly into your dry ingredients.
it is so good
Yay! Glad you enjoyed them.
Hi! Our dough didn’t rise. We used active dry yeast (same as your picture) and warm (not hot water). The dough cracks easily as well? Is that normal? Thank you!
The number 1 reason why dough doesn’t rise – did you check the expiration date on the yeast? If it’s expired, it won’t work. The number 2 reason why dough doesn’t rise if using hot water. Hot water will kill the yeast. Lastly, you need to place the dough in a warm place. Sometimes, it needs longer than mentioned here in the recipe, depending on where you are located, what the weather is like. Give it time to rise. Hope all this helps.
Yum this sounds delicious I had this style of bread last year at a friends house for Dia de Morta it was awesome!
Yes, it’s very common to add to ofrendas or to eat conchas on Dia de los Muertos. So yummy!
These look so good!! I will have to try making these one day!!!
Hope you do. These are super yummy!
The bread looks delicious! Reminds me of some of the sweet bread I had while in Japan.
Japan. No kidding! I would love to visit one day.
These look amazing!!! I wonder how they compare to Japanese melonpan, they look similarly delicious! I’ve actually never tried to make any sort of bread or anything you have to kneed but this has me ready to take on the challenge!!
They are similar in appearance, but Mexican conchas have a slightly different flavor and texture than Japanese melonpan. Both are delicious in their own way, I encourage you to try making these delicious Conchas, you will love them.
Great recipe, love it
Thank you very much! It’s delicious
I haven’t been able to find conchas since i moved, so this recipe was a true treat. They tasted just as good as my favorite bakery back in california!
That’s awesome! So glad you enjoyed this!
These Conchas are absolutely beaitiful. I love Mexican sweet bread. I am always fearful of making bread, but like anything have to walk through this fear, or bake through it! Thanks for sharing, and making it sound so easy!
So glad you enjoyed this Loreto!